#Product Trends
Ink Friction Resistance Tester----Operation Guide
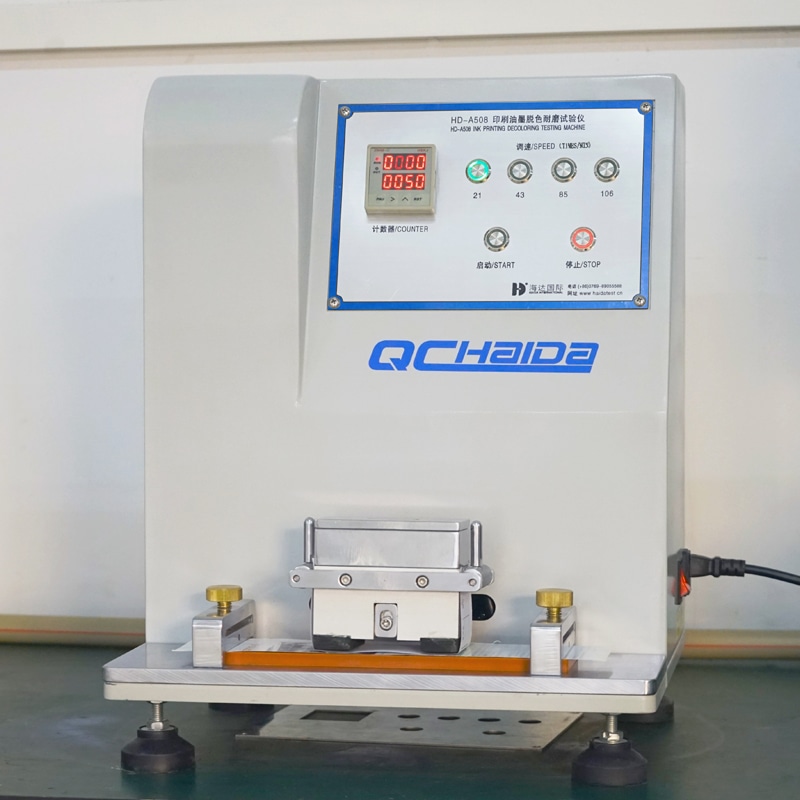
Ink Resistance Tester is suitable for abrasion resistance test of printing ink layer.
Wrap dry or damp standard friction paper on the friction head; rub the surface of the sample with the specified pressure, reciprocating friction stroke and speed; observe the peeling of the ink layer of the sample; confirm the stain marks on the sample and the standard friction paper or the surface of the sample is fluffy or wear.
Machine Operation Guide:
1. Connect the power cord AC220V to ensure that the machine is powered on normally; turn on the power switch.
2. Fix the sample. There are two fixtures on the friction platform, left and right. Lay the sample flat in the jig. The sample is then pressed in by rotation with a fixed axis. Be sure to pay attention to the finish and cleanliness of the sample.
3. Put the standard slider on the shaft. Secure standard friction paper with friction blocks. Place weights according to the required test weight.
4. The up, down, left and right buttons on the operation panel set the number of tests, and press the green button in the lower right corner to start the machine.
5. The 4 green buttons on the panel are (21/43/85/106) times/minute speed, which can be selected according to standard requirements.
6. After the number of tests is reached, press the stop button to take out the standard friction paper and sample. Secondly, the abrasion resistance of the ink layer or coating can be judged by measuring the change in the density of the ink layer or the thickness of the coating before and after rubbing.
NOTE: If the speed needs to be changed during the test, the speed needs to be changed gradually. If it suddenly changes to 21 times/min at 106 times/min, the motor may be damaged. You can also press the stop button and wait for the motor speed to drop. , and then press 21 times/min.


