#Industry News
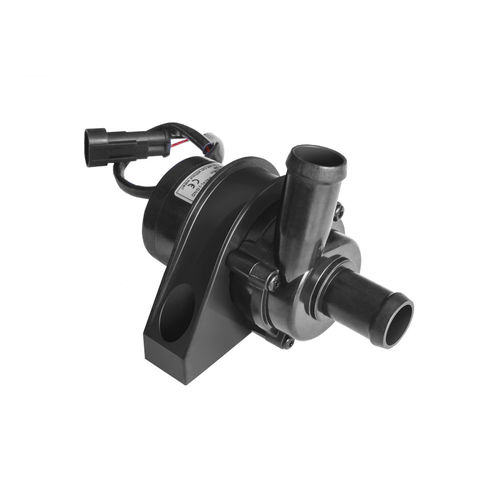
How to install a micro dc water Pump?
TOPSFLO High-end Micro Brushless DC Pump Manufacturer
Installing a micro DC water pump is a straightforward process when you follow the right steps. These compact pumps are essential components in various applications, including cooling systems, medical devices, and more. In this guide, we’ll walk you through the process of correctly installing a micro DC water pump.
Step 1: Gather Your Tools and Materials
Before you begin, make sure you have all the necessary tools and materials. You’ll typically need:
Micro DC water pump
Mounting brackets or hardware
Hoses or tubing
Hose clamps
Electrical connectors
Screwdriver or wrench
Voltage source (battery or power supply)
Step 2: Choose the Installation Location
Select a suitable location for your micro DC water pump. Consider factors like accessibility, proximity to the fluid source, and ventilation.
Ensure the chosen location allows for proper pump mounting and connection to the fluid system.
Step 3: Mount the Pump
Use the provided mounting brackets or hardware to secure the pump in its designated location. Ensure the pump is securely fastened to prevent vibration during operation.
Step 4: Connect the Inlet and Outlet
Attach hoses or tubing to the pump’s inlet and outlet ports. Use appropriate fittings and hose clamps to create a secure and leak-free connection. Double-check that the connections are tight and properly sealed.
Step 5: Electrical Wiring
Follow the manufacturer’s wiring instructions to connect the pump to the appropriate power source. Ensure you use the correct voltage and observe polarity. Use suitable wire gauges and connectors to minimize voltage drops and ensure efficient operation.
Step 6: Prime the Pump
Before starting the pump, prime it by filling the inlet and outlet lines with the fluid. This prevents dry running, which can damage the pump.
Allow the pump to fill completely with fluid to ensure proper priming.
Step 7: Ventilation and Monitoring
Ensure proper ventilation in the installation area to allow any trapped air to escape from the system. Monitor the system during operation to check for any air pockets that could affect pump performance.
Step 8: Temperature Control
Keep an eye on the pump’s operating temperature. Overheating can lead to reduced efficiency and potential damage. Implement cooling solutions like heat sinks or fans if needed.
Step 9: Safety Measures
Follow safety guidelines and regulations during installation and operation to protect personnel and equipment. Consider implementing emergency shut-off mechanisms in case of unexpected issues.
Step 10: Testing and Maintenance
After installation, thoroughly test the pump to verify its performance. Monitor for any potential issues.
Establish a maintenance schedule to ensure the pump continues to operate efficiently.
In conclusion, the correct installation of a micro 12v DC water pump is crucial for its efficient and reliable operation. By following these steps and the manufacturer’s guidelines, you can confidently install your pump and enjoy its benefits in various applications. Proper installation and maintenance will help maximize the pump’s lifespan and performance.


