#Product Trends
How to Select an Industrial Handheld Thermal Camera
Selecting an industrial handheld thermal camera should start with what you inspect, not which specs look best. Most buyers compare resolution and price first.
Selecting an industrial handheld thermal camera should start with what you inspect, not which specs look best. Most buyers compare resolution and price first, then realize their camera lacks the sensitivity to detect the subtle temperature rises that may signal early equipment failure.
This article presents a scenario-first framework. You will work backward from your actual maintenance tasks — electrical panels, motors, HVAC, furnaces — to the exact specs you need, without drowning in detector sizes and spectral bands.
Quick answer: For routine electrical, mechanical, and HVAC maintenance, start with 256×192 resolution, 40 mK NETD, and -20°C to 550°C range. Prioritize NETD for predictive maintenance on motors and bearings. Step up to higher resolution or extended range only when your scenario demands it.
Start With the Inspection Scenario
Before you look at a single spec for your next handheld thermal camera, list the inspection tasks your team performs most often. Nearly all industrial maintenance work falls into one of six scenarios. Each scenario demands a different combination of capabilities.
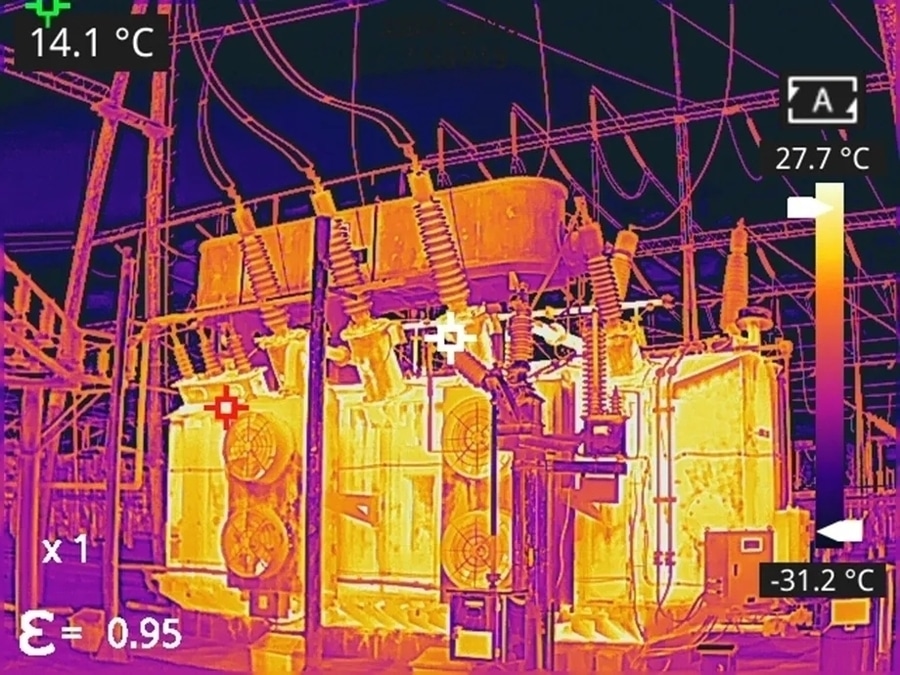
Electrical System Inspection. Switchgear, distribution panels, transformers, and busbars. In substations and remote transmission lines, connection hardware and insulators overheat after high load or weather events. Inside distribution cabinets, oxidized breaker contacts and loose terminals produce small temperature rises that build over time. You need moderate resolution to isolate these specific hot spots and enough sensitivity to detect early-stage anomalies before they escalate.
thermal imaging inspection for transformers
Mechanical Equipment Monitoring. Motors, bearings, pumps, and gearboxes. In dusty or high-load environments, gearbox gears wear and bearing lubrication degrades, producing gradual temperature increases that precede mechanical failure. A small temperature rise on a bearing race may indicate lubrication issues before they are detected through other inspection methods. You need good NETD to catch these subtle changes and trend analysis to separate normal warm-up from dangerous escalation. For real-world examples of thermal imaging in equipment monitoring, see industrial infrared thermal imaging for equipment monitoring.
HVAC and Building Diagnostics. Duct leaks, insulation gaps, and pipe surface temperature variations. Missing insulation on steam or chilled water pipes creates detectable surface temperature patterns that indicate energy loss. Partial blockages in HVAC or process piping also produce localized temperature differences. You need good sensitivity for small ΔT values and a standard lens for room-scale or pipe-run scanning.
High-Temperature Process Monitoring. Furnaces, kilns, reactors, and heat exchangers operate well above 500°C. In petrochemical and metallurgical processes, tube coking or heat exchanger fouling creates local hot spots that reduce efficiency and risk tube rupture. The camera must measure extended ranges without clipping, and telephoto lenses let you maintain safe distance from hot surfaces.
Thermal Imaging Application In Oil and Petrochemical Industry
Circuit Design and R&D Testing. PCB thermal analysis and component validation require high resolution and macro capability. You are looking at millimeter-scale features and need precise measurement accuracy.
Predictive Maintenance Rounds. Multi-asset inspections across an entire facility demand long battery life, fast startup, and intelligent inspection workflows. The camera becomes a daily tool carried for hours at a time, so ergonomics and software efficiency matter as much as image quality.
Pick your primary scenario. If you handle two or more regularly, choose the one with the most demanding requirements. That scenario will drive your camera selection.
The 4 Specs That Actually Change Your Choice
Once you know your scenario, four specs determine whether a camera can handle the job: resolution, NETD, temperature range, and field of view.
Resolution and IFOV
Resolution means pixel count — the number of independent temperature measurement points in each frame. More pixels let you identify smaller hot spots at a given distance or detect the same-sized hot spot from farther away.
But more is not always better. The table below shows what each resolution tier handles in real maintenance work:
Resolution Super-Resolution Best For
160×120 320×240 Basic screening, tight budgets
256×192 512×384 Standard maintenance, most inspections
480×360 960×720 Expert analysis, detailed diagnostics
640×512 1280×1024 Professional thermography, small targets
1280×1024 2560×2048 Research, microelectronics, NDT
The key question is not “How many pixels?” but “Can I see the smallest target I need to inspect, from the distance I work at?” The answer depends on IFOV — instantaneous field of view, measured in milliradians. A lower IFOV means each pixel covers a smaller area.
Here is a practical reference for detecting a 10-millimeter hotspot:
Resolution IFOV Max Detection Distance
160×120 4.62 mrad ~2.2 m
256×192 3.8 mrad ~2.6 m
480×360 0.92 mrad ~10.9 m
640×512 0.63 mrad ~15.9 m
1280×1024 0.34 mrad ~29.4 m
If you inspect electrical panels from one meter away, 256×192 can typically handle the job. If you inspect overhead lines from 15 meters, you need 640×512 or higher.
NETD
NETD — Noise Equivalent Temperature Difference — measures the smallest temperature difference a camera can distinguish from background noise. Lower numbers mean better sensitivity.
NETD Performance Level Best For
<30 mK Excellent Early fault detection, subtle anomalies
30–40 mK Very Good Standard predictive maintenance
40–50 mK Good Routine inspections, obvious hot spots
>50 mK Fair Basic screening only
A lower NETD helps the camera distinguish smaller temperature differences in the thermal image, but actual measurement accuracy still depends on emissivity, distance, reflected temperature, focus, and operating conditions. For predictive maintenance, NETD often matters more than resolution. A 40 mK camera at 256×192 may detect subtle bearing temperature changes more effectively than a higher-resolution camera with poorer sensitivity, depending on the target size, distance, focus, emissivity, and operating conditions.
Temperature Range
Industrial thermal cameras typically offer multiple measurement ranges. The camera must handle both the coldest and hottest targets in your facility without clipping.
Temperature Range Typical Applications
-20°C to 150°C HVAC, building diagnostics, low-temp processes
-20°C to 550°C General electrical/mechanical maintenance
-20°C to 650°C Motors, steam systems, and electrical panels
400°C to 1500°C+ Furnaces, kilns, metallurgy
Check the hottest asset in your facility before buying. If your steam system peaks at 580°C, a -20°C to 550°C camera will clip and give unreliable readings above that point.
FOV and Lens Options
The lens determines how much area the camera sees at a given distance:
Lens Type Typical FOV Best For
Wide-angle 45°×36° Panel scans, building envelopes
Standard 25°×20° Most routine inspections
Telephoto 14°×11° Overhead lines, elevated equipment
Super telephoto 7°×5.6° High-voltage towers, chimneys
Macro Close-up PCB inspection, small components
A standard lens covers most scenarios. Wide-angle helps when you need to capture entire electrical panels without stepping back. Telephoto lenses keep you at a safe distance from high-temperature or high-voltage equipment. Macro lenses are essential for circuit board work.
If your work spans multiple scenarios, use the most demanding one as your baseline. For routine electrical, mechanical, and HVAC maintenance, the 256×192 / 40 mK / -20°C to 550°C configuration is a practical starting point. For predictive maintenance programs, step up to a Professional-tier camera with better NETD and structured workflows. Move to the Expert tier only for research-grade analysis, microelectronics, or processes above 650°C, where measurement precision directly affects safety or product quality.
Software, Workflow, and Ergonomics
Technical specs get the attention, but software and ergonomics determine whether your team actually uses the camera effectively every day.
On-device analysis. Can you add measurement points, draw analysis areas, and set temperature alarms directly on the camera? These features let you mark up images during inspection without waiting until you are back at a desk.
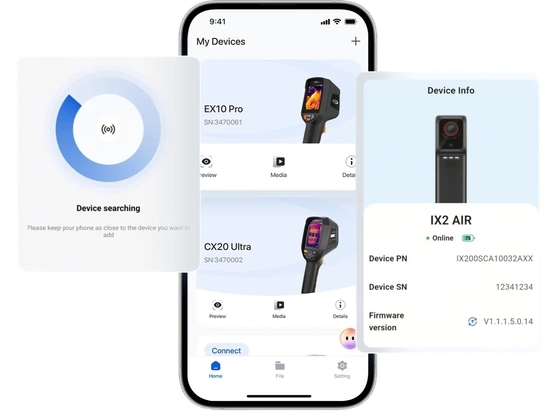
PC client and supporting software. Field images often need deeper review. A good PC client lets you adjust palettes, measure temperatures more precisely, generate PDF reports, and compare images from different inspection dates. Raythink’s TI Studio PC client supports secondary analysis and report generation. If your team produces compliance reports, this software is not optional — it is part of the tool. A mobile app adds convenience for real-time sharing, while radiometric video streaming to a PC helps catch intermittent faults that appear only under load or during startup cycles.
Thermal camera software interface for online temperature analysis with region measurement, line measurement, and temperature trend curve.
Ergonomics and daily use. A camera with outstanding specs that weighs 1.3 kg and runs for three hours will sit in the case more often than one that weighs 1.1 kg and lasts a full eight-hour shift. Check the weight with battery installed, the grip design for one-handed operation, and whether the screen remains readable in direct sunlight. Angle-adjustable displays and rotatable handles help when inspecting overhead lines or cramped enclosures. Fast startup from power-on to the first image matters when you are trying to catch a transient thermal event before it disappears.
Common Buying Mistakes
Even with the right framework, buyers make the same mistakes repeatedly.
Confusing digital zoom with real optical performance. A camera advertised with “16× digital zoom” does not see farther. Digital zoom crops and stretches the image, adding no real thermal detail. What matters for detecting small hot spots at distance is the combination of native resolution, pixel pitch, and lens focal length. Check the IFOV and native optical magnification, not the marketing zoom number.
Ignoring pixel pitch and the resolution–NETD trade-off. A 640×512 detector with 12 µm pixel pitch and 40 mK NETD is not automatically better than a 384×288 detector with 17 µm pixel pitch and <25 mK NETD. Smaller pixels collect less thermal energy per pixel, which can hurt sensitivity in low-contrast or adverse weather conditions. Evaluate the detector as a system — resolution, pixel pitch, and NETD together — rather than chasing the highest pixel count alone.
Neglecting emissivity correction for metal surfaces. Shiny metals such as copper busbars and aluminum enclosures have emissivity values as low as 0.1 to 0.3. Without proper emissivity correction, a thermal camera can report temperatures that deviate by tens of degrees from reality. The same metal surface can show significantly different temperature readings depending on the emissivity setting. If your inspections involve bare metal, choose a camera that allows adjustable emissivity and learn how to apply it.
Mismatching frame rate to the inspection scenario. A 9 Hz refresh rate is adequate for static temperature measurement, but it produces motion blur when you pan across equipment or inspect vibrating machinery. For route-based inspections or moving platforms, 30 Hz is the practical minimum. High-vibration environments or fast-moving targets need 50–60 Hz to avoid missing transient hot spots.
Budgeting only for purchase price, not the total cost of ownership. Beyond the camera itself, factor in annual calibration, software licenses, spare batteries, accessories, operator training, and potential downtime during service or calibration. A camera that looks cheap on paper can become the expensive choice if its software ecosystem is limited or its calibration turnaround leaves you without a backup unit for six weeks.
Buying based on laboratory specs without checking environmental ratings. A camera that performs well in a climate-controlled lab may not perform reliably in a steel mill, chemical plant, or outdoor substation if its environmental rating does not match the deployment conditions. Verify the IP rating, operating temperature range, and vibration resistance against your actual deployment environment. If the camera is not rated for the dust, moisture, or temperature swings it will encounter, the specs on the datasheet do not matter.
Recommended Raythink Camera Tiers
The framework above works with any manufacturer’s cameras. To make it concrete, here is how Raythink’s handheld lineup maps to professional tiers.
Your Primary Work Tier Key Specs Models
HVAC, basic electrical, automotive walk-throughs Entry 160×120–256×192, 40 mK, -20°C to 550°C EX10, CX200 SE+, CX200 Pro+
Daily electrical/mechanical inspection, predictive maintenance Professional 480×360–640×512, 35 mK, -20°C to 650°C RT400, RM620
R&D, microelectronics, high-temperature processes Expert 640×512–1280×1024, 25 mK, up to 1500°C RS600, RS1280
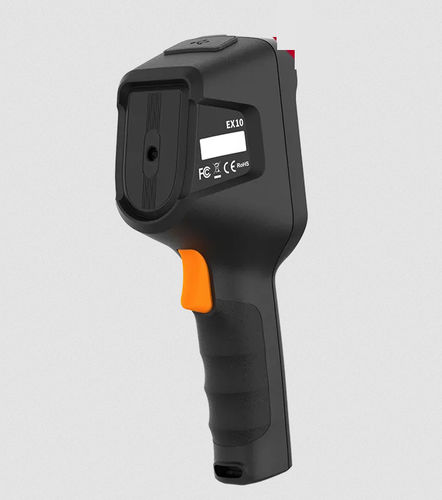
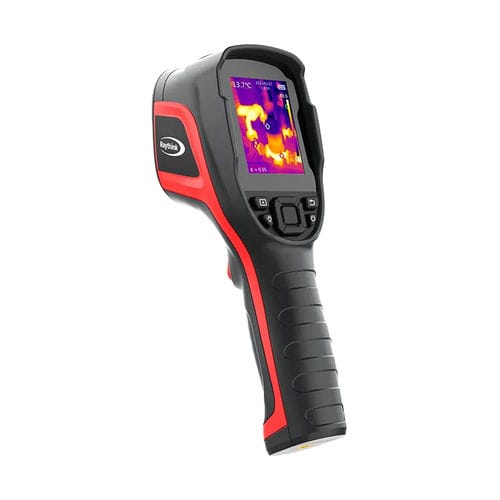
For entry-level work, the EX10 handheld thermal camera packs a 10-hour battery into a compact body for routine checks. The CX200 SE+ offers 256×192 resolution with 32GB MicroSD storage expandable up to 128GB.
EX10 Handheld Thermal Camera
EX10 handheld thermal camera
CX200SE+
CX200 SE+ handheld thermal camera
The CX200 Pro+ adds a visible-light camera and Wi-Fi to the same core platform for clearer field reports.
For professional predictive maintenance programs, the RT400 runs Android OS with built-in trend analysis and multiple lens options. The RM620 delivers 640×512 resolution with inspection task package support for structured workflows.
RT400 Expert Thermal Camera, Professional Thermal Camera
RT400 Expert Thermal Camera
RM620 Handheld Thermal Camera, Handheld Thermal Imager
RM620 Handheld Thermal Camera
For expert applications involving high temperatures or microelectronics, the RS600 handles up to 1500°C with a variable diaphragm lens, and the RS1280 delivers 1280×1024 resolution with an angle-adjustable display for pixel-level temperature detail.
RS600 Flagship Thermal Camera, Professional Thermal Camera
RS600 Flagship Thermal Camera
RS1280 Flagship Thermal Camera, Professional Thermal Imaging Camera
RS1280 Flagship Thermal Camera
Pre-Purchase Checklist
Use this checklist before you finalize any thermal camera purchase. If you can check every box, you are better prepared to choose a camera that matches your inspection needs.
I have identified my primary inspection scenario(s)
I have checked the resolution-to-distance table for my actual working distances
I know the hottest and coldest temperatures I need to measure
I have verified that the NETD meets my early-detection requirements
I have confirmed the lens options cover my inspection distances
I have evaluated the software ecosystem (PC client and mobile app)
I have confirmed that battery life covers my longest inspection shift
I have checked the IP rating and drop test for my work environment
I have factored accessories, calibration, and training into my budget
I have checked warranty coverage and support responsiveness
I have downloaded or requested a demo if available
Long-term considerations: Most industrial thermal cameras need regular calibration. Ask about calibration turnaround time — if the camera is gone for six weeks, you need a backup plan. Also, factor in training time for your team to learn the camera and software.
FAQ about Select Industrial Handheld Thermal Cameras
What is emissivity, and why does it matter for thermal measurements?
Emissivity measures how efficiently a surface emits thermal radiation, ranging from 0 (perfect reflector) to 1 (perfect emitter). Thermal cameras calculate temperature from the infrared radiation they receive. If the emissivity setting is wrong, the camera misinterprets reflected radiation as emitted radiation and reports an incorrect temperature. Shiny metals have low emissivity (0.1–0.3) and reflect surrounding heat, while oxidized or painted surfaces have higher emissivity (0.8–0.95) and produce more reliable readings. Always match the emissivity setting to your target material before measuring.
How often should an industrial thermal camera be calibrated?
Many manufacturers recommend regular calibration for cameras used in predictive maintenance programs. Calibration helps correct gradual sensor drift that may affect temperature readings and inspection consistency. Cameras used frequently or exposed to harsh environments may require shorter calibration intervals. Budget for turnaround time as well; if the camera needs to be sent out for calibration, plan for a backup unit or schedule service during planned maintenance windows.
What is the difference between radiometric and non-radiometric thermal images?
A radiometric thermal image stores temperature data for every pixel, allowing you to measure temperatures and adjust analysis parameters after capture. A non-radiometric image is a visual thermal picture without embedded temperature data — you can see hot spots, but you cannot measure them precisely or change palettes and measurement points later. For maintenance inspections and compliance reporting, radiometric images are essential because they let you re-analyze findings, compare historical data, and generate detailed reports from the same original capture.
Can a thermal camera see through walls, glass, or plastic?
No. Thermal cameras detect infrared radiation emitted from surfaces — they cannot see through solid objects. Glass blocks infrared wavelengths, so pointing a thermal camera at a window shows the glass surface temperature, not what is behind it. Thin plastic films may transmit some infrared, but most industrial plastics block it. For inspections, you must have a direct line of sight to the target surface. If you need to inspect inside an electrical panel or behind insulation, you must open the enclosure or remove the covering material first.
Conclusion
Selecting the right industrial handheld thermal camera starts with matching capability to the task — not memorizing spec sheets. Start with your inspection scenario, confirm the resolution and temperature range, prioritize NETD for predictive maintenance, and evaluate software and ergonomics before you buy. The best camera detects the faults you need to catch, from the distances you work at, with a workflow your team can use consistently.
If you are still deciding which thermal camera fits your maintenance program, contact Raythink for a personalized consultation or to schedule a product demo.